Volcano in WorldBuilder 4
This is a pretty simple project. It uses some of WorldBuilder 4′ s more familiar tools, but in a slightly different way.
Note that this tutorial is designed to be used with the free downloadable Demo version of WorldBuilder 4. Certain features such as file and rendered image saving are disabled in this version. If you would like to compare your work with the scene created in this tutorial example *.awb files are available for download along with this tutorial.
Let’ s start by opening WorldBuilder 4. The default scene includes the basics for creating our environment: a Camera, a Parallel Light source, a Landscape and a Compound Sky element.
Note: To speed up rendering, the AltoStratusClouds2 and SunDiskWithHalo1 components have been hidden. They can be ‘unhidden’ at any time by right-clicking on them in the Scene Tree.
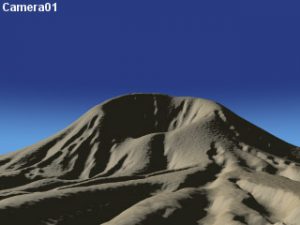
Add a Skeleton Line set from the Library. Choose volcano3 from the skeletons group and drag it into the Scene Tree.

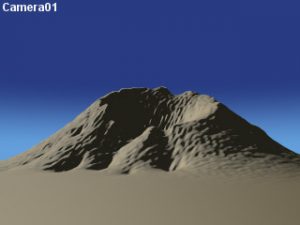
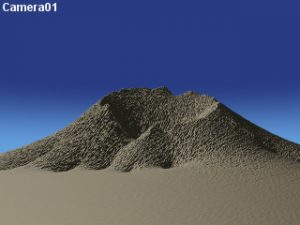
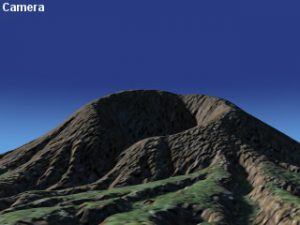
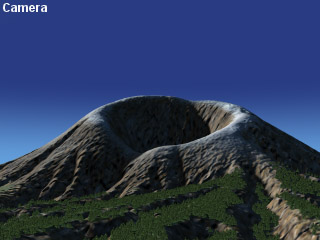
Render the scene in the Camera Viewport, to observe how our Skeleton Lines are deforming our landscape.
Note: the camera and light angles in this tutorial is different from the one in the default scene file. See the example scene file volcano_tutorial.awb for precise camera and light Location & Direction property coordinates.
Now let’ s fine-tune the geometry of the landscape.
For Landscape0, use a Settings > Points value of 1024.
Enable Cast Shadow (so that our mighty Volcano throws a mighty shadow) and Shielded Polygon Culling (so that WorldBuilder’ s rendering engine will ‘ignore’ those parts of the landscape terrain mesh which are not visible to the camera, thereby saving render time).
Note: The light source(s) in this tutorial use the Shadow Map feature. For more information about Shadow Maps see the WorldBuilder Basics tutorial.
Under Landscape0′ s Skin property, set Evolution to 70; this will give our volcano a relatively smooth slope angle.
Now set Roughness to 93; this will keep the slope surface itself from appearing too smooth and featureless.
Render the scene again.
Our volcano may look a little strange at this stage.
That’s because we’re not quite done with adjusting its geometry.
Take a moment to think about some of the conditions around our volcano. When mud and lava erupt and flow down the slopes, the flows carve deep troughs into the landscape.
These carved areas basically break up the surface, which is one visual characteristic of very large objects (like volcanoes).
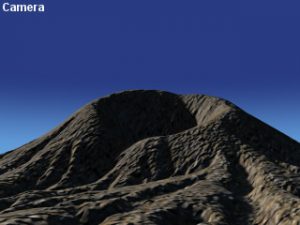
Let’ s apply an Erosion Filter to the Landscape mesh. This will carve out some interesting-looking furrows into the slopes and simulate some of the effects of mudflows at the base of the mountain.
Right-click on the Skin property, drag down to Add…
Select Landscape Erosion Type II and click OK. Use the default settings in the Property Page.
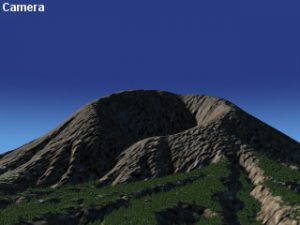
Let’ s check our adjustments in a new render.
Our volcano will need some material shading. In the Library’ s materials group, select the sand02 material and drag it onto Area 1 (full).
Render the scene again.
That’ s quite an improvement, but we still need to work on the impression that this is a mountainous object. Trees scattered around the base of the volcano will also help to enhance its sense of scale.
Make a new Area on Landscape0, around the base of the volcano, and (mostly) within camera range. In the Library, select GrandFir 1 from the trees group.
![]()
Select Area2 in the Scene tree and drag GrandFir 1 onto it in the Properties Tree.

Choose Scattered Vegetation in the Select Type(s) of Object dialog box.
In the Size & Density property, use low values in the Height Range and Average Density parameters -under 10- to make the trees appear smaller (so that our volcano appears larger).
Use Placing Conditions to limit tree growth to certain parts of the furrowed areas. Basically, we want to have our forest of fir trees growing in the upper and lower parts of the furrows.
You may have to experiment with different Altitude Range settings to confine the tree growth properly (the example scene file uses a high value of 40 and a low value of -20).
When seen from the Top viewport, we can observe how the Placement Conditions property effects the distibution of our trees (in this screenshot, the Camera and Parallel Light have been hidden to more clearly how the tree).
For added realism you may also want to enable both Cast Shadow and As Flipboard, in the Shadows & Reflections property.
Before rendering, select the Objects List property (for the Area2 Scattered Vegetation) and enable Draw as Flipboards. This will greatly reduce render times.

As a finishing touch for the terrain, let’s add two more Materials on top of the one you added previously. Select and drag grass20 from the Library onto Area 1 (full).
Let’ s use a time-saving trick to limit the placement of this new material:
In Area2, select the Placing Conditions property for the scattered GrandFir 1 trees. At the top of the Property Page, select Copy from the Property Toolbar. This will ‘capture’ the settings for this property.
Now select grass20 in Area 1 (full) and then select its Placing Conditions property. In the Property Toolbar click on Paste to apply the settings we copied from the Area2 Scattered Vegetation.
![]()
…and here is the scene with the trees included, and with one last material added on top of the grassy material: snow02. This material is controlled by its own Placing Conditions property as well as an Altitude Fractalizer.
For more information about Altitude Fractalizer, see the WorldBuilder Basics: Part 3 tutorial.
The green, grassy material provides a visual ‘anchor’ for the trees, and they don’ t seem to be arbitrarily sprouting from the soil.


![]()
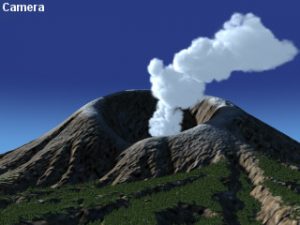
Now let’ s create a vapor plume. This is often an occurrence with real volcanoes; superheated gases, steam and ash escape through surface vents and form huge overhead clouds.
Add a Cumulonimbus cloud. Place it within the caldera (the summit ‘crater’ ).
In the Cloud Shape property, reduce the X and Y settings for Voxels Number.
This will make our initial cloud shape tall and relatively skinny. Using only the Scale manipulator tool in this case might produce unwanted compression or stretching of detail within the cloud.

Now add another cloud.
The idea behind our method is that we need to stack about 4 or 5 clouds atop one another, starting at the bottom and working our way to the top. Each successive cloud should be slightly larger than the one beneath it.
Each cloud should also have a certain amount of horizontal offset (it may help to visualize this as a stack of boxes, with the boxes at the top off-center).
Because we want our clouds to appear as one continuous stream of vapor, and not (as they are) a stacked set of separate objects, it will be necessary to allow for a certain amount of vertical overlap between our clouds.
Whether you’ ve been adding new clouds or duplicating them and moving them into place, the clouds may look too similar.
Adjust each cloud’s Voxels Number, Random Seed and Spheres Number properties.
Also try some variations with the Cloud Profile property.
Let’s render the scene again to see how our plume looks at this stage.
The default color of the cumulonimbus cloud is a little brighter than we’d like. Let’s darken them a little bit.
Select the Cloud Shader property for the first cloud.
Choose darker shades for the Cloud and Ambient Colors.
Set the Albedo to 0.9; this will help keep the clouds from looking too dark.

Before we render the scene again, let’s make some adjustments to its overall color scheme.
The default colors in the Scene elements are a little too ‘cool’; let’s change them to better give an impression of heat.
In the Scene Tree, select the Ambient Light property. Choose a dark brown color.
Right-click on the Atmosphere property and pull down to Add…
Choose Haze from the Volumetric Shaders group.
In the Haze Property Page, choose a light brown Haze Color.
In the Atmosphere property, right-click again and pull down to Add…
Choose Fog from the Volumetric Shaders group.
In the Fog Property Page, click on Pick Color. Choose a very light yellow-brown color.
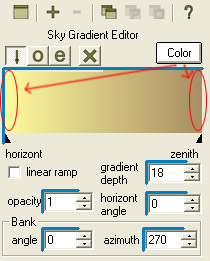
Finally, expand the Compound Sky element (in the Scene Tree) and select the Ramp Layer.
In the Properties Tree, Select the Color Gradient property.
In the Property Page, use the Color Picker to select a light yellow color for the Horizon Gradient Key, and a darker brown color for the Zenith (to assign a color from the picker, click OK and then click on the gradient just above the key slider at either end of the gradient).

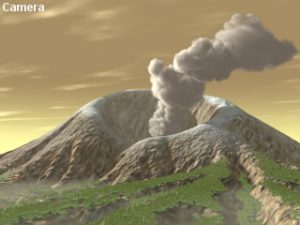
Let’s render the final image.
The final version of the example WorldBuilder scene file an extra Spot Light which is used to create some extra ‘sky fill’ illumination.
This brings us to the end of our tutorial. We hope you found it fun and informative. Watch our website for forthcoming tutorials for WorldBuilder and other Digital Element products.
Until then, happy worldbuilding!